")
Screen printing is a creative, practical, and surprisingly accessible technique. If you’ve ever seen custom t-shirts, posters, or printed merchandise, you’ve probably wondered how they are made. In many cases, the answer is screen printing.
In this guide, you’ll learn in a simple and clear way how screen printing works, what materials you need, the step-by-step process, common mistakes, and how much it costs to get started in 2026.
Video tutorial: how to do screen printing step by step
In this video, you can see the full screen printing process explained in a simple way. It’s perfect if you want to visually understand each step, from preparing the screen to the final print.
Watch closely how the squeegee is used, how much pressure is applied, and how to achieve a clean print. This will help you avoid common beginner mistakes.
What is Screen Printing?
Screen printing, also known as serigraphy, is a printing technique that uses a mesh screen stretched over a frame. A stencil is created on the screen to control where the ink passes through.
Some areas of the screen are blocked, while others remain open. When ink is applied and pushed across the screen, it only passes through the open areas and transfers the design onto the surface below.
The result is a durable, vibrant, and long-lasting print. This is why screen printing is widely used for clothing, posters, packaging, and promotional products.
How Screen Printing Works
To understand the basics, think of screen printing as an advanced stencil technique. The design is transferred onto the mesh, creating areas that allow ink through and areas that block it.
When you push ink across the screen using a squeegee:
- Ink passes through open areas
- Blocked areas prevent ink from passing
The final result is your design printed onto the material. The quality depends on control, pressure, and preparation.
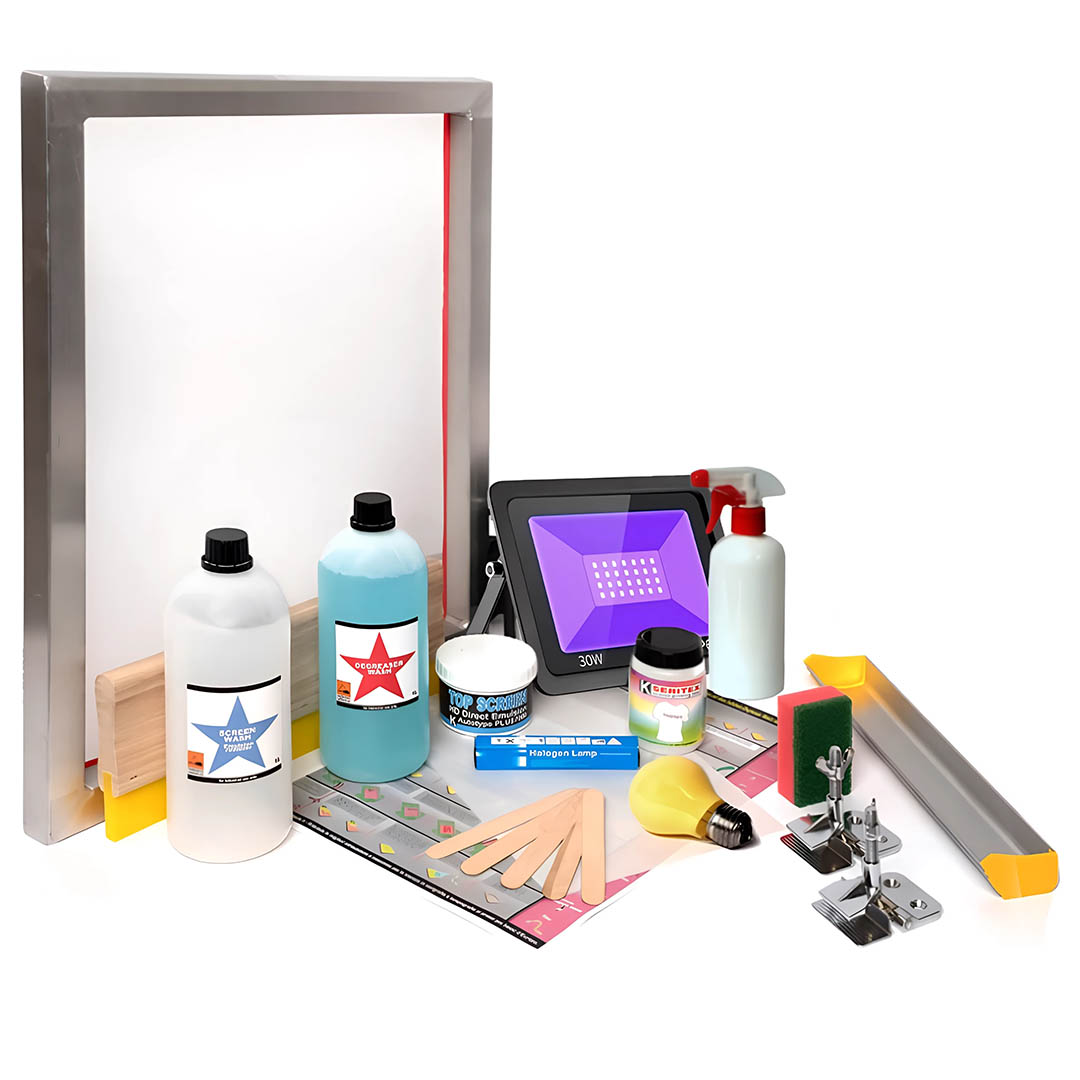
Materials You Need
One of the best things about screen printing is that you can start with a relatively small budget. Here are the essential materials:
Screen Frame
The main tool. It can be made of wood or aluminum and holds the mesh tightly stretched.
Squeegee
A rubber blade tool used to push ink through the screen.
Screen Printing Ink
Different inks are used depending on the material:
- Fabric → textile ink
- Paper → water-based ink
- Hard surfaces → specialty inks
Photo Emulsion
A light-sensitive liquid used to create the stencil on the screen.
Transparency Film
The design is printed on a transparent sheet and used during exposure.
Light Source
Used to expose and harden the emulsion. UV light works best.
Printing Surface
The material you want to print on, such as t-shirts, paper, or wood.
Step-by-Step Screen Printing Process
1. Prepare the Screen
Apply photo emulsion evenly across the mesh. Let it dry in a dark space.
2. Create the Design
Print your design onto a transparency sheet. Simple designs are best for beginners.
3. Expose the Screen
Place the transparency on the screen and expose it to light. The exposed areas harden.
4. Wash the Screen
Rinse the screen with water. The unexposed emulsion washes away, revealing the design.
5. Set Up for Printing
Place the screen over your material and secure it in position.
6. Print the Design
Add ink and use the squeegee to push it across the screen in a smooth motion.
7. Dry the Print
Let the print dry. Fabric prints often require heat setting.
Practical Examples
Printing a T-shirt
This is the most common use. Textile ink is applied and then heat is used to fix the print.
Printing on Paper
Great for posters and artwork. No heat is required.
Printing on Wood
Requires more control, but creates unique and artistic results.
Common Mistakes
Using Too Much Ink
Causes blurry and messy prints.
Wrong Pressure
Too much or too little pressure affects print quality.
Poor Emulsion Application
Uneven coating leads to poor stencil quality.
Incorrect Exposure Time
Underexposure weakens the stencil. Overexposure blocks details.
No Test Print
Always test before printing on the final surface.
Costs in 2026
- Screen frame: $20–$50
- Squeegee: $10–$30
- Ink: $10–$25
- Emulsion: $15–$40
- Accessories: $10–$30
Total beginner setup: around $60–$150.
Advanced equipment can cost $300–$500 or more.
Beginner Tips
Start with simple designs. Avoid complex multi-color prints at the beginning.
Practice regularly. Screen printing improves with experience.
Keep your workspace clean and organized.
Don’t get discouraged. Mistakes are part of the learning process.
Conclusion
Screen printing is an accessible and creative technique that anyone can learn. With a few tools and some practice, you can start creating your own custom prints at home.
This beginner guide gives you everything you need to start in 2026. The next step is simple: try it yourself.
1 Comment(s)
Non avevo mai capito bene come funzionasse la serigrafia, qui è spiegata davvero terra terra ???? Mi sa che proverò . Ma secondo voi serve per forza tutta l’attrezzatura o si può iniziare in modo più “artigianale”?
Ciao Marco, sì, qualcosa si può improvvisare, ma alcuni elementi sono proprio fondamentali: lampada, racla, telaio e inchiostro servono per forza.. Poi sul resto puoi arrangiarti un po’ all’inizio ;)
Leave a Comment